
### Blog Post:
trail running vest hydration is changing how runners, hikers, and endurance athletes carry water and essentials on the move. Reliable hydration access, comfort, and smart gear organization make or break your day on trails. If you’re struggling with awkward bottles, leaky bladders, or frustrating bounce, this guide explains what matters and how to get it right—the first time.
Key Takeaways
- Trail running vest hydration systems offer hands-free drinking, quick refills, and reduce bounce—if sized and set up properly.
- Soft flasks work best for fast access and short runs; bladders win for longer outings, but both have strengths and real downsides.
- Fit, bottle reinsertion, and maintenance are top pain points—know what to watch for before you hit the trail.
The Core Concept
Trail running vest hydration means having water bottles or a bladder built right into your running vest—making fluids (and gear) easy to access without stopping. These vests are designed to reduce bottle bounce, spread the weight evenly, and let you run, hike, or train longer with fewer breaks and less fumbling for gear. The design details—like where bottles sit, how hoses route, and what pockets store—create a real difference in comfort and performance. If you want a comparison of how these vests differ from regular backpacks or hiking packs, it helps to know what sets true trail running hydration systems apart from the rest.

Step-by-Step Guide
Here’s how to set up and use your trail running vest hydration system for best results—even if you’re a beginner or upgrading from bottles in your hand:
- Check Gear Compatibility: Start by checking that your vest fits your torso and shoulder width. Most vests come in multiple sizes and some are gender-specific for better fit.
- Decide on Soft flasks or Bladder: For fast races or short runs, use soft flasks up front. For long or remote routes, add a bladder in the rear slot, but test how it changes weight balance and ventilation.
- Install and Secure Hydration: Insert the soft flasks in the front pockets—angled slightly angled for your chest size and shape. Thread the bladder hose through guides on your shoulder straps if using a rear reservoir.
- Stash Essentials in Front: Use spare chest pockets for gels, snacks, a phone, and a small first aid kit. Consider a small trash ziplock so wrappers don’t mix with drink spillage.
- Adjust Fit: Stand up straight, close the sternum straps (usually two or three), and tighten until secure but not restrictive. You want everything tight enough to prevent bouncing, but not so tight it causes pressure or chafing (especially for those with a larger chest).
- Test Movement: Jog in place or run up stairs at home. Make sure bottles don’t bounce excessively and that you can drink without removing your vest. Adjust if needed.
- Practice Refill & Reinsertion: Refill both types—soft flasks and bladder—with water. Practice reinserting bottles into snug or locking pockets and learn to refill the bladder quickly (unclip, slide out, refill, re-slot, reroute hose).
- Keep Clean: After each session, empty fluids, rinse the reservoir, and hang to air dry fully. Clean soft flasks with bottle brushes; use dedicated bladder-cleaning kits for reservoirs to avoid microbial buildup especially on long days or in warm weather.
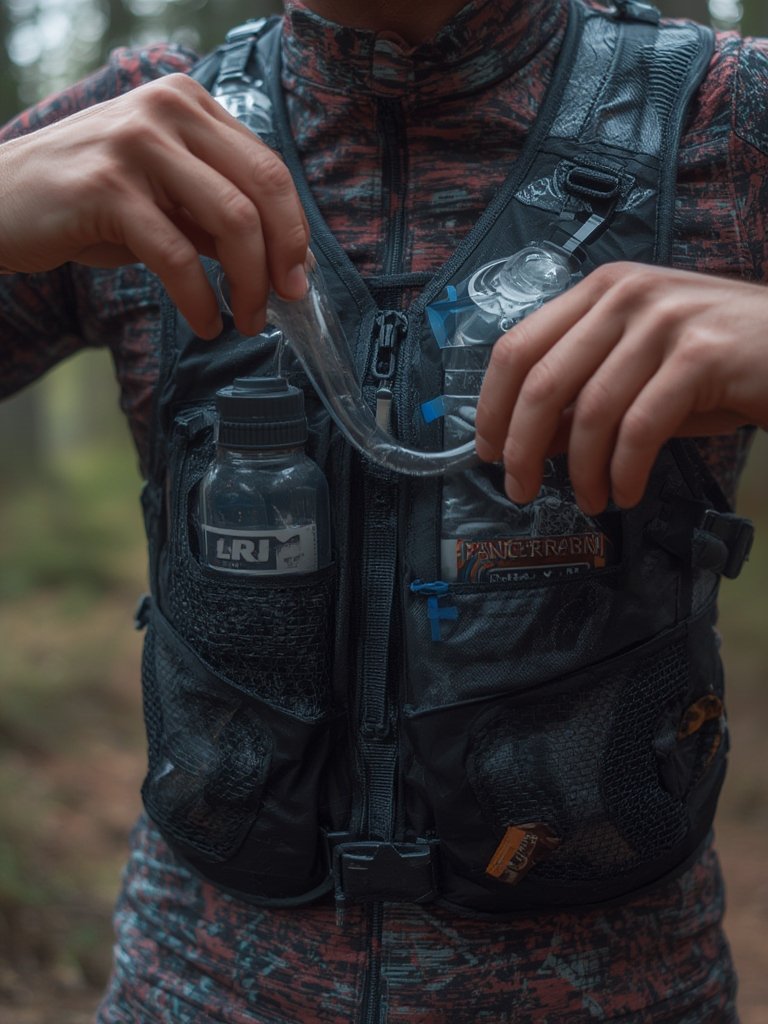
Want more expert packing and gear prep ideas? Check out our guide to lightweight hiking backpacks for tips on cutting weight and boosting comfort.
Advanced Analysis & Common Pitfalls
Even the best trail running vest hydration system isn’t perfect for everyone. Here’s what both field tests and real users say you should watch out for:
| Hydration System | Biggest Strength | Common Weakness | Ideal Use |
|---|---|---|---|
| Soft Flasks (Front) | Quick access; visible level; less sloshing | Difficult to reinsert, only 1L in front, bottles can rub or leak; eats up storage space | Short to medium runs, races, fast aid stations |
| Rear Bladder | Higher capacity (1.5–2.5L); keeps hands free; more storage options up front | Have to remove vest to refill; hard to judge water left; hose can leak or bounce; less ventilation; harder to clean | Longer runs, hikes, routes without water stops |
| Rigid Bottles | Durable; easy to clean | Can bounce or chafe; usually less capacity; often fit poorly in running vests | Day hikes, run-walks where frequent removal is OK |
- Bottle Reinsertion: Many runners complain about having to stop or slow down to get soft flasks back in the front pockets, especially mid-run or when tired. Choose vests with funnel-shaped sleeves or flexible opening tabs.
- Retention Issues: Elastic bottle holders wear out in a few months if used heavily. Look for reinforced or replaceable retention bands, especially if you’ll be running multiple days per week.
- Size and Body Shape: Runners with a larger chest or narrow shoulders may find bottles dig in, rub, or even bruise. Opt for gender-specific fits, adjustable sternum placements, or angled bottle pockets where possible. For detailed chest and torso comfort, see the gender and sizing section in the iRunFar best running vests review.
- Chafing and Leaks: Bottle caps, seams, or even bite valves may chafe or drip, especially over hours of sweating and movement. Bring a tested anti-chafing balm and always test your bottles for leaks with upside down “shake tests” at home.
- Storage Tradeoffs: Every bottle in a front pocket is one less slot for snacks, a phone, or small gear. On all-day outings, a bladder plus soft flask combo gives you more total storage.
- Rear Bladders: While they greatly extend your range, they make it harder to refill at aid stations or on the move. For non-stop ultras, practice refills and hose rerouting before race day. This advice echoes tips in the Trail and Mountain Gear Reviews.
- Maintenance Nightmares: Bladders can harbor mold in the hose or bite valve; soft flasks develop odor if not dried completely. Use bottle brushes and special drying hangers immediately after runs.
- Durability: Heavy washing, sweat, and repeated filling cause elastic sleeves to stretch. Some reviewers reported the sleeves lost grip after six months. Consider this if you’re racing or using your vest for both hiking and running.
For more insights into gear preservation and long-term trail comfort, you might want to explore our comprehensive hiking socks merino wool and hiking tent 2 person guides, proven to prevent avoidable frustration and blisters.

Performance details and additional comparison reviews available at REI’s hydration vest advice. User durability reports also collected by GearJunkie and CleverHiker.
Conclusion
Your comfort, hydration, and performance hinge on choosing and setting up the right vest. Trail running vest hydration is only as effective as the fit, bottle configuration, and your maintenance habits. Prioritize comfort, bottle access, and long-term durability over flashy features. If you’re ready for the next upgrade, or just want to get rid of random leaks and trail-time fumbles, take a tactical approach.
Act now: Test-fit your gear, experiment on a short trail, and be prepared to swap hydration systems as the weather or run length demands. Your best run is ahead—start optimizing your trail running vest hydration setup today.
FAQ Section
How much water should I carry in a trail running vest?
Carry enough for the route, temperature, and your pace—usually 1 liter for short efforts and up to 2–2.5 liters for longer or remote runs. Mix flasks and a bladder if aid stations or refill spots are uncertain.
What is better for trail running, soft flasks or a bladder?
Soft flasks are faster to refill and let you see your fluid level; bladders hold more but are harder to refill on the move. Many runners combine both for long events—fast sips up front, big capacity in back.
How do I prevent chafing from my hydration vest?
Make sure the fit isn’t too tight and adjust bottle angle. Use anti-chafing balm on skin that contacts bottlenecks, seams, and sternum straps. Try different shirt materials for high-mileage efforts.
How often should I replace soft flasks or bladder hoses?
Most soft flasks last 6–12 months of weekly use; replace earlier if they lose shape, start leaking, or develop persistent odor. Bladder hoses need thorough drying—swap them out when knotted, cracked, or moldy.
What else should I store in my hydration vest?
Spare calories, salt tabs, a phone, first aid kit, and a lightweight rain jacket. See more in our hiking food energy bars and hiking rain jacket women expert guides.